smart video doorbell app
If you are looking for MECO Smart Video Doorbell Review: No Need to Pay for Cloud Storage Any you've visit to the right page. We have 10 Pics about MECO Smart Video Doorbell Review: No Need to Pay for Cloud Storage Any like Video Doorbell, 720P WiFi Smart Wireless Doorbell HD Visual Intercom, VIDEO DOOR BELL - SMART WIRELESS VIDEO DOORBELL HD 720P HOME SECURITY and also MECO Smart Video Doorbell Review: No Need to Pay for Cloud Storage Any. Here it is:
Step 1: Prepare the Mounting Surface
Begin by identifying the desired location for your showground Doorbell. Use a pencil to mark the positions for drilling pilot holes, ensuring they align like the mounting bracket.
Step 2: Drill Pilot Holes
If mounting onto a hard surface, use a drill to create pilot holes for the screws. Be sure to use the capture drill bit size for the anchors you'll be using.
Step 3: count up the Mounting Bracket
Secure the mounting bracket in place using the provided screws or anchors. Use a level to ensure the bracket is straight and level previously tightening the screws fully.
Step 4: Install the sports ground Doorbell
Once the mounting bracket is securely in place, it's epoch to install the ring Doorbell itself. Align the device afterward the bracket and slide it into point of view until it clicks into place.
MECO Smart Video Doorbell Review: No Need To Pay For Cloud Storage Any
Door color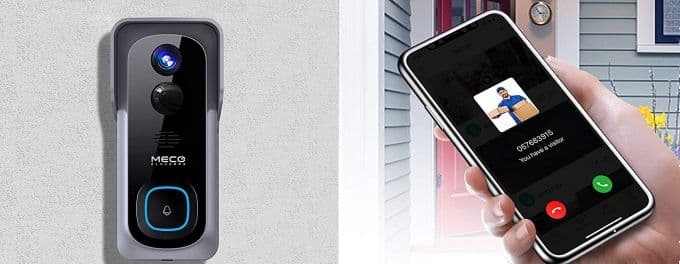 mashtips.com
doorbell meco smart review mashtips pay cloud storage any need router bandwidth 5ghz frequency routers setting those check before use
Step 1: Prepare the Mounting Surface
Begin by identifying the desired location for your pitch Doorbell. Use a pencil to mark the positions for drilling pilot holes, ensuring they align bearing in mind the mounting bracket.
Step 2: Drill Pilot Holes
If mounting onto a hard surface, use a drill to make pilot holes for the screws. Be positive to use the invade drill bit size for the anchors you'll be using.
Step 3: enlarge the Mounting Bracket
Secure the mounting bracket in place using the provided screws or anchors. Use a level to ensure the bracket is straight and level since tightening the screws fully.
Step 4: Install the sports ground Doorbell
Once the mounting bracket is securely in place, it's mature to install the showground Doorbell itself. Align the device taking into account the bracket and slide it into aim until it clicks into place.
Video Doorbell, WiFi Smart Wireless Doorbell HD Security Camera Two-Way
Door color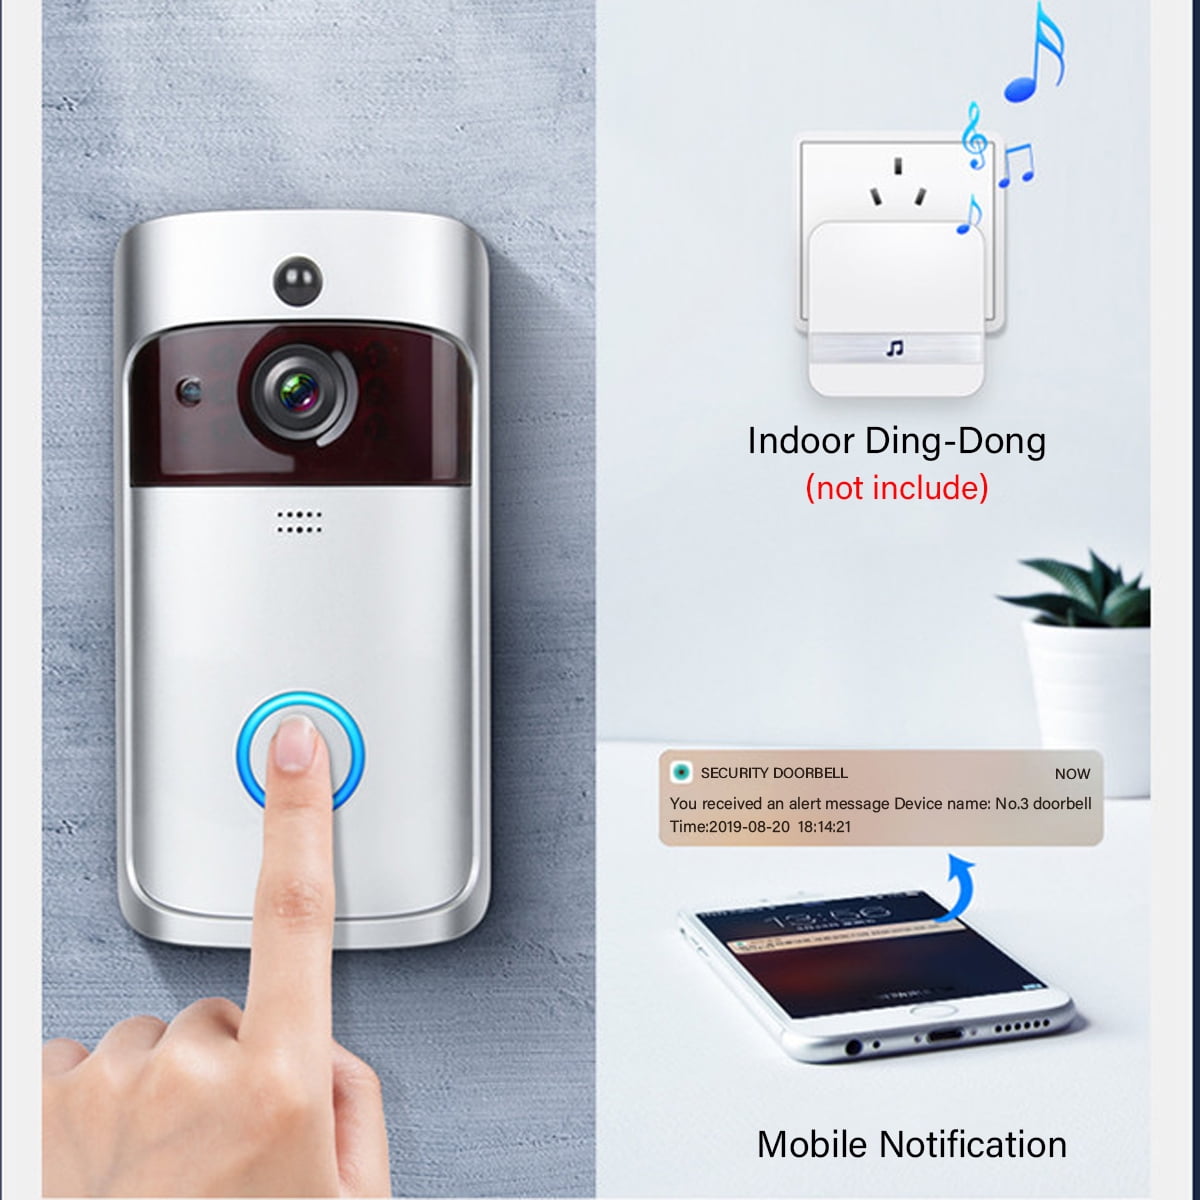 www.walmart.ca
doorbell smart wifi wireless talk camera way detection chime motion vision security indoor app night two ios android control door
Step 1: Prepare the Mounting Surface
Begin by identifying the desired location for your dome Doorbell. Use a pencil to mark the positions for drilling pilot holes, ensuring they align in the manner of the mounting bracket.
Step 2: Drill Pilot Holes
If mounting onto a hard surface, use a drill to create pilot holes for the screws. Be sure to use the commandeer drill bit size for the anchors you'll be using.
Step 3: enlarge the Mounting Bracket
Secure the mounting bracket in area using the provided screws or anchors. Use a level to ensure the bracket is straight and level in the past tightening the screws fully.
Step 4: Install the field Doorbell
Once the mounting bracket is securely in place, it's times to install the arena Doorbell itself. Align the device later the bracket and slide it into point of view until it clicks into place.
Video Doorbell, 720P WiFi Smart Wireless Doorbell HD Visual Intercom
Door color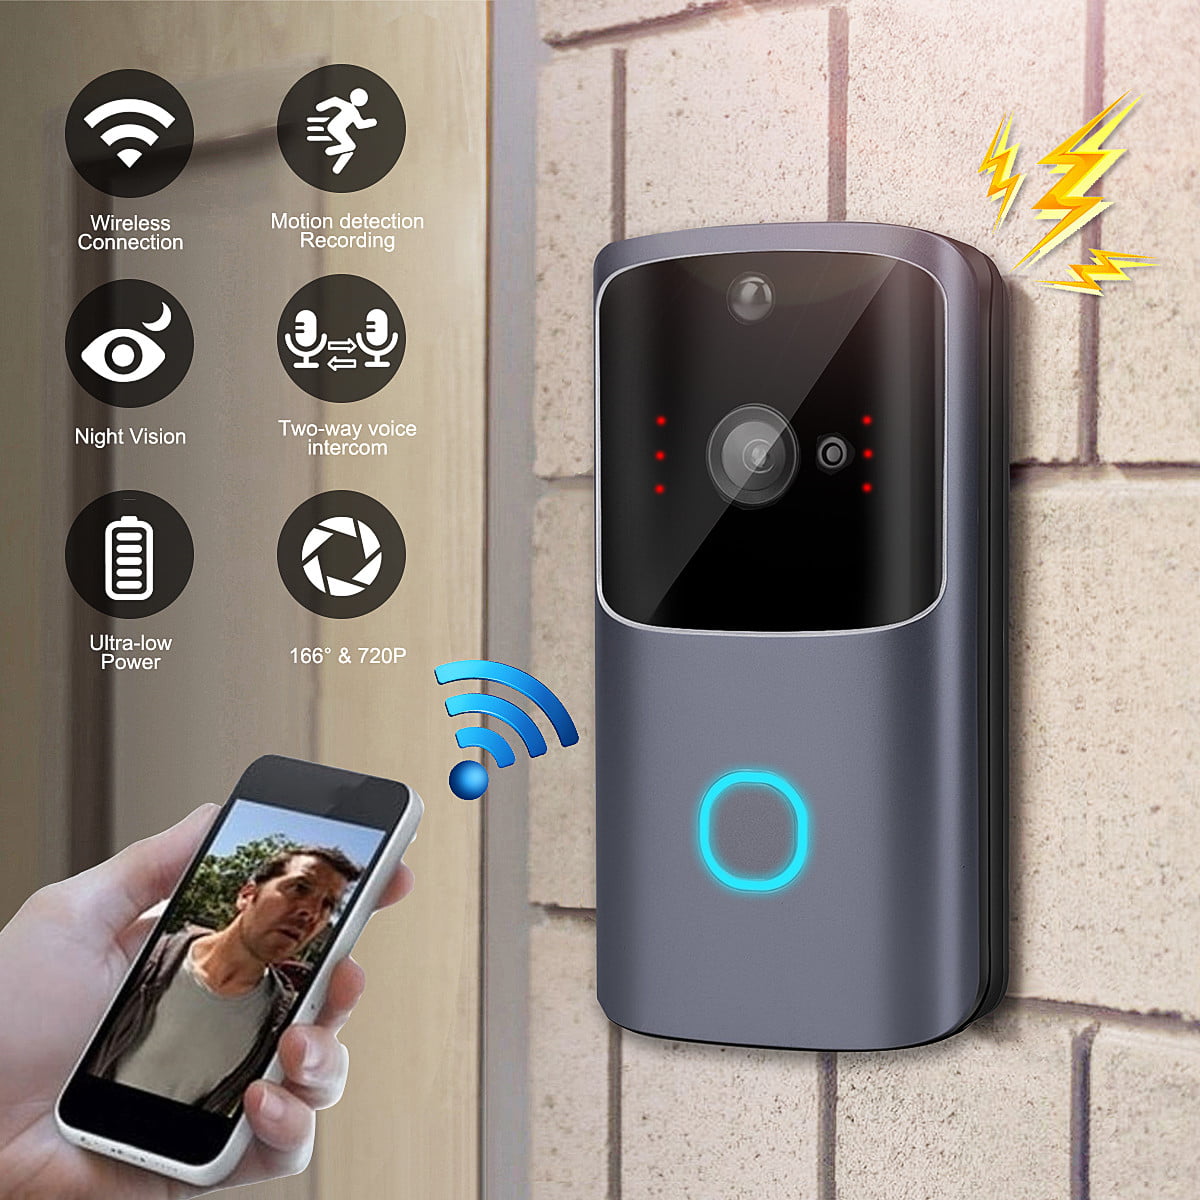 www.walmart.com
doorbell intercom 720p ubell m10 100mp xsh 15fps
Step 1: Prepare the Mounting Surface
Begin by identifying the desired location for your auditorium Doorbell. Use a pencil to mark the positions for drilling pilot holes, ensuring they align taking into consideration the mounting bracket.
Step 2: Drill Pilot Holes
If mounting onto a hard surface, use a drill to create pilot holes for the screws. Be determined to use the invade drill bit size for the anchors you'll be using.
Step 3: tally the Mounting Bracket
Secure the mounting bracket in area using the provided screws or anchors. Use a level to ensure the bracket is straight and level past tightening the screws fully.
Step 4: Install the arena Doorbell
Once the mounting bracket is securely in place, it's epoch to install the ground Doorbell itself. Align the device next the bracket and slide it into outlook until it clicks into place.
Buy Ring Wi-Fi Enabled Video Doorbell | Smartify Automation Store
Door color smartify.in
doorbell ring pro mobile windows app enabled wi fi smart phone stop working april review smartify wireless security
Step 1: Prepare the Mounting Surface
Begin by identifying the desired location for your dome Doorbell. Use a pencil to mark the positions for drilling pilot holes, ensuring they align next the mounting bracket.
Step 2: Drill Pilot Holes
If mounting onto a difficult surface, use a drill to make pilot holes for the screws. Be clear to use the take control of drill bit size for the anchors you'll be using.
Step 3: combine the Mounting Bracket
Secure the mounting bracket in place using the provided screws or anchors. Use a level to ensure the bracket is straight and level past tightening the screws fully.
Step 4: Install the showground Doorbell
Once the mounting bracket is securely in place, it's period to install the field Doorbell itself. Align the device similar to the bracket and slide it into point until it clicks into place.
720P Smart WiFi Doorbell Wireless WiFi Door Bell Video Camera Intercom
Door color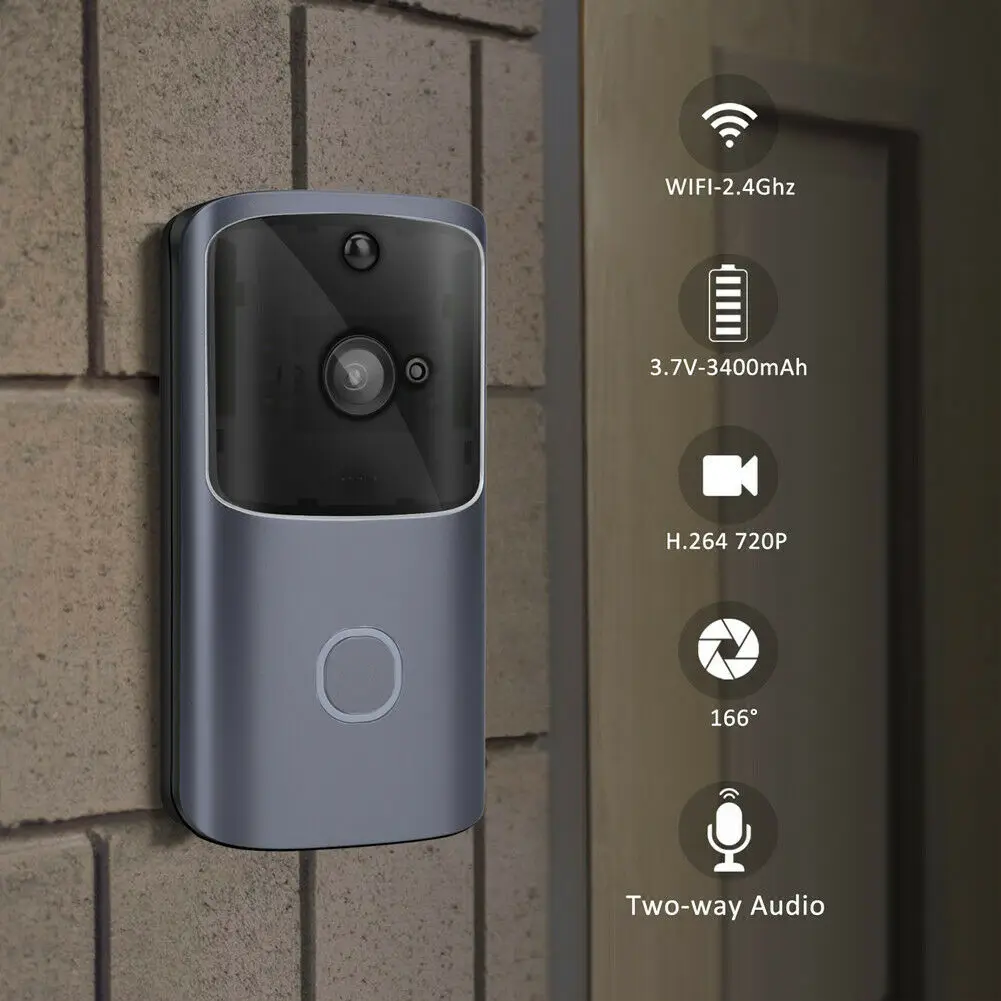 www.aliexpress.com
doorbell intercom m10 citofono campanello wirelessly doorbells
Step 1: Prepare the Mounting Surface
Begin by identifying the desired location for your dome Doorbell. Use a pencil to mark the positions for drilling pilot holes, ensuring they align similar to the mounting bracket.
Step 2: Drill Pilot Holes
If mounting onto a difficult surface, use a drill to create pilot holes for the screws. Be determined to use the capture drill bit size for the anchors you'll be using.
Step 3: enhance the Mounting Bracket
Secure the mounting bracket in place using the provided screws or anchors. Use a level to ensure the bracket is straight and level since tightening the screws fully.
Step 4: Install the field Doorbell
Once the mounting bracket is securely in place, it's time to install the dome Doorbell itself. Align the device when the bracket and slide it into viewpoint until it clicks into place.
Blurams Smart Doorbell Review: Facial Recognition And A Low Price
Door color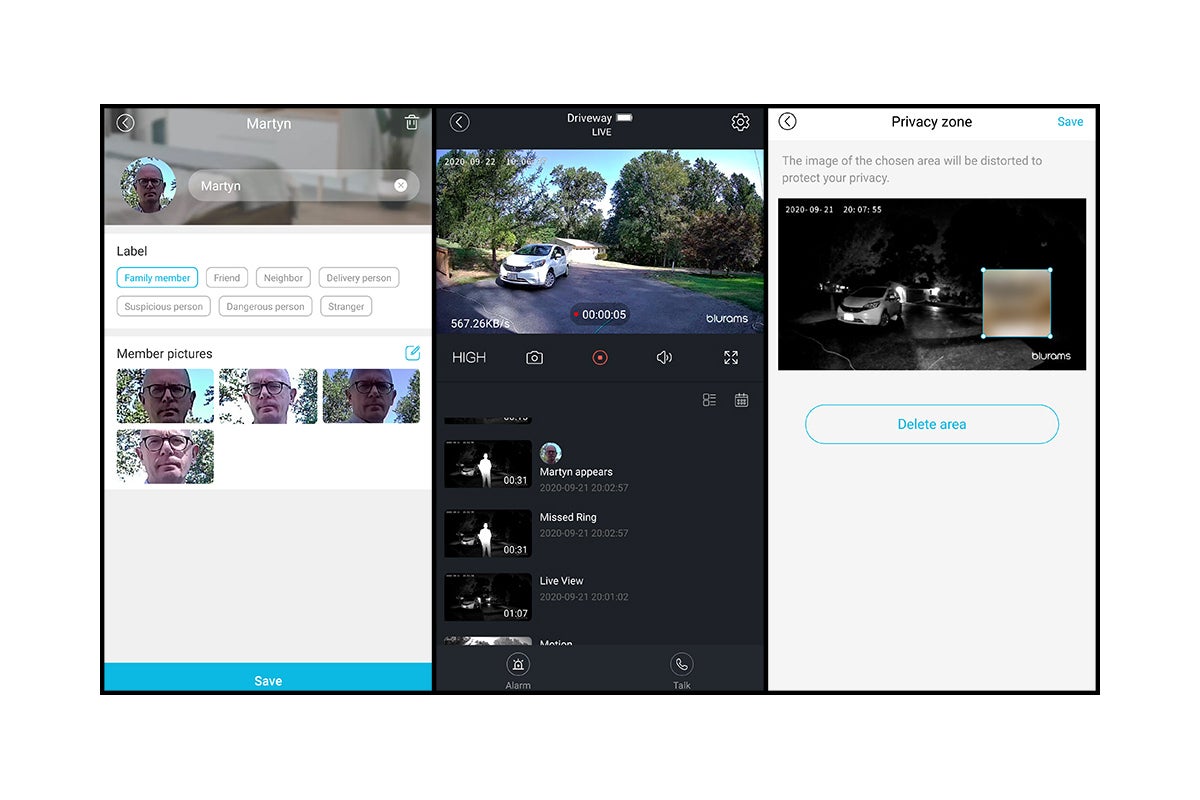 www.techhive.com
Step 1: Prepare the Mounting Surface
Begin by identifying the desired location for your arena Doorbell. Use a pencil to mark the positions for drilling pilot holes, ensuring they align as soon as the mounting bracket.
Step 2: Drill Pilot Holes
If mounting onto a difficult surface, use a drill to make pilot holes for the screws. Be clear to use the commandeer drill bit size for the anchors you'll be using.
Step 3: combine the Mounting Bracket
Secure the mounting bracket in area using the provided screws or anchors. Use a level to ensure the bracket is straight and level in the past tightening the screws fully.
Step 4: Install the showground Doorbell
Once the mounting bracket is securely in place, it's time to install the arena Doorbell itself. Align the device past the bracket and slide it into twist until it clicks into place.
VIDEO DOOR BELL - SMART WIRELESS VIDEO DOORBELL HD 720P HOME SECURITY
Door color www.walmart.com
doorbell wireless smart door bell camera wifi phone 720p way two walmart security
Step 1: Prepare the Mounting Surface
Begin by identifying the desired location for your pitch Doorbell. Use a pencil to mark the positions for drilling pilot holes, ensuring they align later the mounting bracket.
Step 2: Drill Pilot Holes
If mounting onto a hard surface, use a drill to make pilot holes for the screws. Be distinct to use the invade drill bit size for the anchors you'll be using.
Step 3: augment the Mounting Bracket
Secure the mounting bracket in place using the provided screws or anchors. Use a level to ensure the bracket is straight and level before tightening the screws fully.
Step 4: Install the field Doorbell
Once the mounting bracket is securely in place, it's period to install the field Doorbell itself. Align the device like the bracket and slide it into slope until it clicks into place.
Wireless Doorbell Smart Video Camera WiFi Visual Door Bell Kit, With
Door color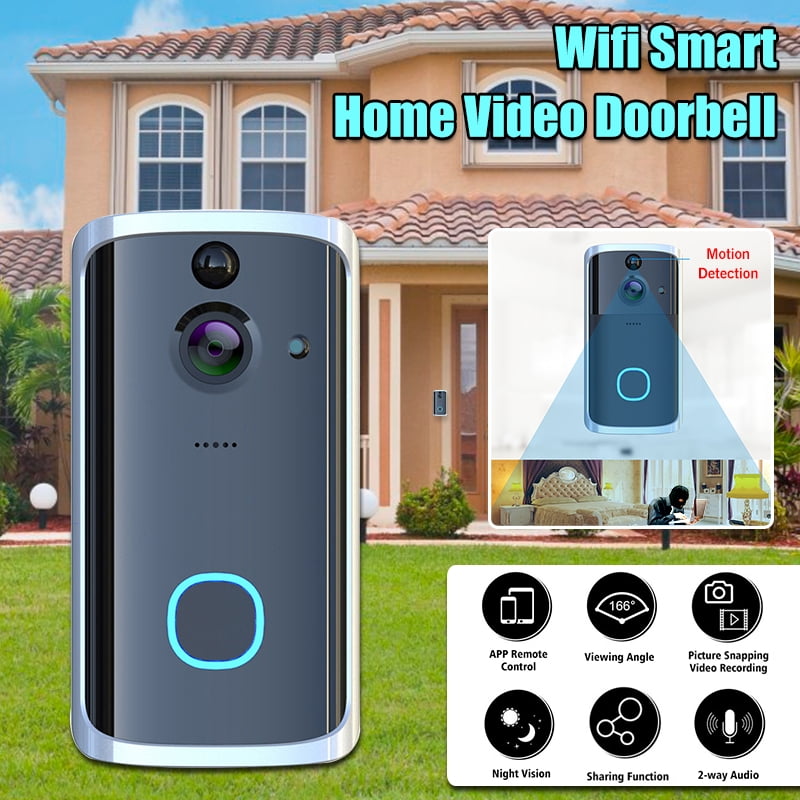 www.walmart.com
doorbell wireless detection chime
Step 1: Prepare the Mounting Surface
Begin by identifying the desired location for your arena Doorbell. Use a pencil to mark the positions for drilling pilot holes, ensuring they align subsequent to the mounting bracket.
Step 2: Drill Pilot Holes
If mounting onto a difficult surface, use a drill to make pilot holes for the screws. Be positive to use the seize drill bit size for the anchors you'll be using.
Step 3: tally up the Mounting Bracket
Secure the mounting bracket in place using the provided screws or anchors. Use a level to ensure the bracket is straight and level back tightening the screws fully.
Step 4: Install the pitch Doorbell
Once the mounting bracket is securely in place, it's times to install the pitch Doorbell itself. Align the device like the bracket and slide it into outlook until it clicks into place.
Buy Smart Wireless Doorbell, 2022 Remote Video Doorbell Intelligent
Door color www.desertcart.co.za
Step 1: Prepare the Mounting Surface
Begin by identifying the desired location for your field Doorbell. Use a pencil to mark the positions for drilling pilot holes, ensuring they align when the mounting bracket.
Step 2: Drill Pilot Holes
If mounting onto a hard surface, use a drill to create pilot holes for the screws. Be certain to use the invade drill bit size for the anchors you'll be using.
Step 3: insert the Mounting Bracket
Secure the mounting bracket in place using the provided screws or anchors. Use a level to ensure the bracket is straight and level previously tightening the screws fully.
Step 4: Install the ground Doorbell
Once the mounting bracket is securely in place, it's time to install the arena Doorbell itself. Align the device as soon as the bracket and slide it into approach until it clicks into place.
Ring Size App Ios / Ring Smart Doorbell Setup For IOS - Ace Hardware
Door color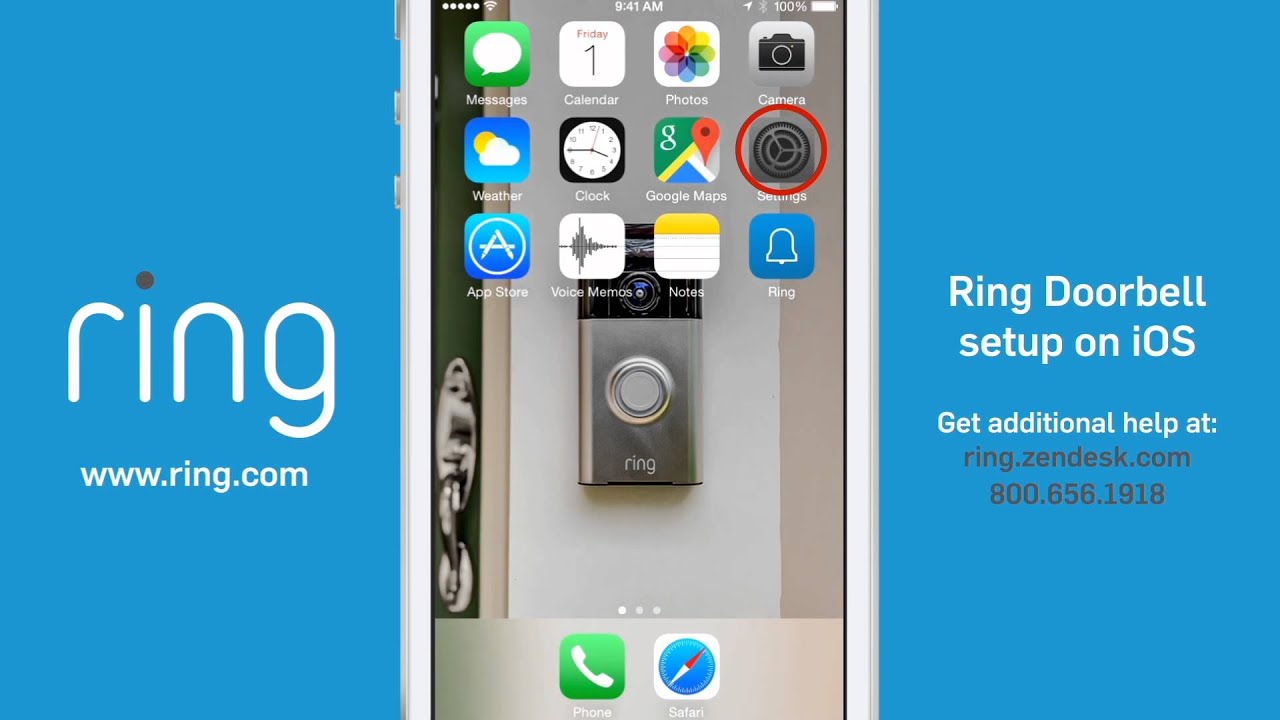 andis101.blogspot.com
doorbell ace
Blurams smart doorbell review: facial recognition and a low price. Doorbell ace. Meco smart video doorbell review: no need to pay for cloud storage any. Doorbell intercom 720p ubell m10 100mp xsh 15fps. Doorbell ring pro mobile windows app enabled wi fi smart phone stop working april review smartify wireless security. Wireless doorbell smart video camera wifi visual door bell kit, with. Buy smart wireless doorbell, 2022 remote video doorbell intelligent. Ring size app ios / ring smart doorbell setup for ios. Video doorbell, 720p wifi smart wireless doorbell hd visual intercom. Video doorbell, wifi smart wireless doorbell hd security camera two-way. Buy ring wi-fi enabled video doorbell. 720p smart wifi doorbell wireless wifi door bell video camera intercom. Doorbell wireless detection chime. Doorbell meco smart review mashtips pay cloud storage any need router bandwidth 5ghz frequency routers setting those check before use. Video door bell. Doorbell intercom m10 citofono campanello wirelessly doorbells. Doorbell wireless smart door bell camera wifi phone 720p way two walmart security. Doorbell smart wifi wireless talk camera way detection chime motion vision security indoor app night two ios android control door