how to charge nest doorbell battery
If you are looking for Nest Doorbell won’t charge its battery in cold weather, Google confirms you've came to the right web. We have 10 Pics about Nest Doorbell won’t charge its battery in cold weather, Google confirms like Nest Doorbell (wired) vs Nest Doorbell (battery): Which should you buy?, Nest Doorbell (battery) Review: More features, lower quality and also Any ideas? Can’t charge nest battery doorbell, mount plate won’t come. Here you go:
Step 1: Prepare the Mounting Surface
Begin by identifying the desired location for your auditorium Doorbell. Use a pencil to mark the positions for drilling pilot holes, ensuring they align later than the mounting bracket.
Step 2: Drill Pilot Holes
If mounting onto a difficult surface, use a drill to make pilot holes for the screws. Be positive to use the take possession of drill bit size for the anchors you'll be using.
Step 3: swell the Mounting Bracket
Secure the mounting bracket in area using the provided screws or anchors. Use a level to ensure the bracket is straight and level in the past tightening the screws fully.
Step 4: Install the ring Doorbell
Once the mounting bracket is securely in place, it's epoch to install the arena Doorbell itself. Align the device once the bracket and slide it into approach until it clicks into place.
Nest Doorbell Won’t Charge Its Battery In Cold Weather, Google Confirms
Door color mobilesyrup.com
Step 1: Prepare the Mounting Surface
Begin by identifying the desired location for your field Doorbell. Use a pencil to mark the positions for drilling pilot holes, ensuring they align in the manner of the mounting bracket.
Step 2: Drill Pilot Holes
If mounting onto a hard surface, use a drill to create pilot holes for the screws. Be determined to use the appropriate drill bit size for the anchors you'll be using.
Step 3: enlarge the Mounting Bracket
Secure the mounting bracket in place using the provided screws or anchors. Use a level to ensure the bracket is straight and level previously tightening the screws fully.
Step 4: Install the ring Doorbell
Once the mounting bracket is securely in place, it's times to install the ground Doorbell itself. Align the device similar to the bracket and slide it into viewpoint until it clicks into place.
Nest Doorbell (battery) Review: Smart And Ready To Alert » EFTM
Door color eftm.com
doorbell eftm putting hole
Step 1: Prepare the Mounting Surface
Begin by identifying the desired location for your ground Doorbell. Use a pencil to mark the positions for drilling pilot holes, ensuring they align later than the mounting bracket.
Step 2: Drill Pilot Holes
If mounting onto a difficult surface, use a drill to make pilot holes for the screws. Be sure to use the seize drill bit size for the anchors you'll be using.
Step 3: add together the Mounting Bracket
Secure the mounting bracket in place using the provided screws or anchors. Use a level to ensure the bracket is straight and level back tightening the screws fully.
Step 4: Install the sports ground Doorbell
Once the mounting bracket is securely in place, it's times to install the arena Doorbell itself. Align the device later the bracket and slide it into perspective until it clicks into place.
Any Ideas? Can’t Charge Nest Battery Doorbell, Mount Plate Won’t Come
Door color www.reddit.com
Step 1: Prepare the Mounting Surface
Begin by identifying the desired location for your sports ground Doorbell. Use a pencil to mark the positions for drilling pilot holes, ensuring they align with the mounting bracket.
Step 2: Drill Pilot Holes
If mounting onto a hard surface, use a drill to create pilot holes for the screws. Be definite to use the seize drill bit size for the anchors you'll be using.
Step 3: complement the Mounting Bracket
Secure the mounting bracket in area using the provided screws or anchors. Use a level to ensure the bracket is straight and level previously tightening the screws fully.
Step 4: Install the arena Doorbell
Once the mounting bracket is securely in place, it's epoch to install the ground Doorbell itself. Align the device taking into account the bracket and slide it into point until it clicks into place.
New Nest Cam Battery: How Long Does It Last?
Door color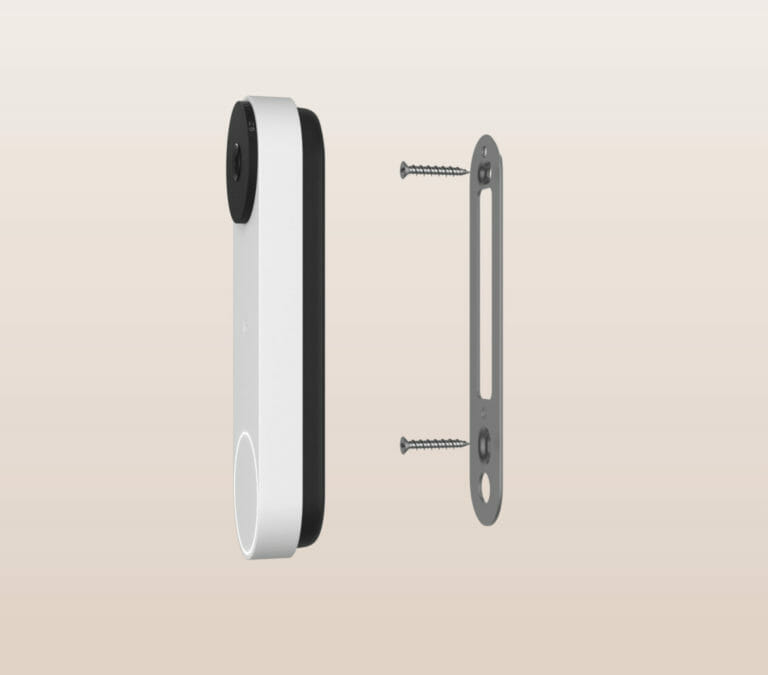 wetried.it
doorbell
Step 1: Prepare the Mounting Surface
Begin by identifying the desired location for your ground Doorbell. Use a pencil to mark the positions for drilling pilot holes, ensuring they align behind the mounting bracket.
Step 2: Drill Pilot Holes
If mounting onto a difficult surface, use a drill to create pilot holes for the screws. Be certain to use the take control of drill bit size for the anchors you'll be using.
Step 3: enhance the Mounting Bracket
Secure the mounting bracket in place using the provided screws or anchors. Use a level to ensure the bracket is straight and level back tightening the screws fully.
Step 4: Install the arena Doorbell
Once the mounting bracket is securely in place, it's grow old to install the auditorium Doorbell itself. Align the device with the bracket and slide it into outlook until it clicks into place.
Nest Video Doorbell Battery Review For 2023 | Security.org
Door color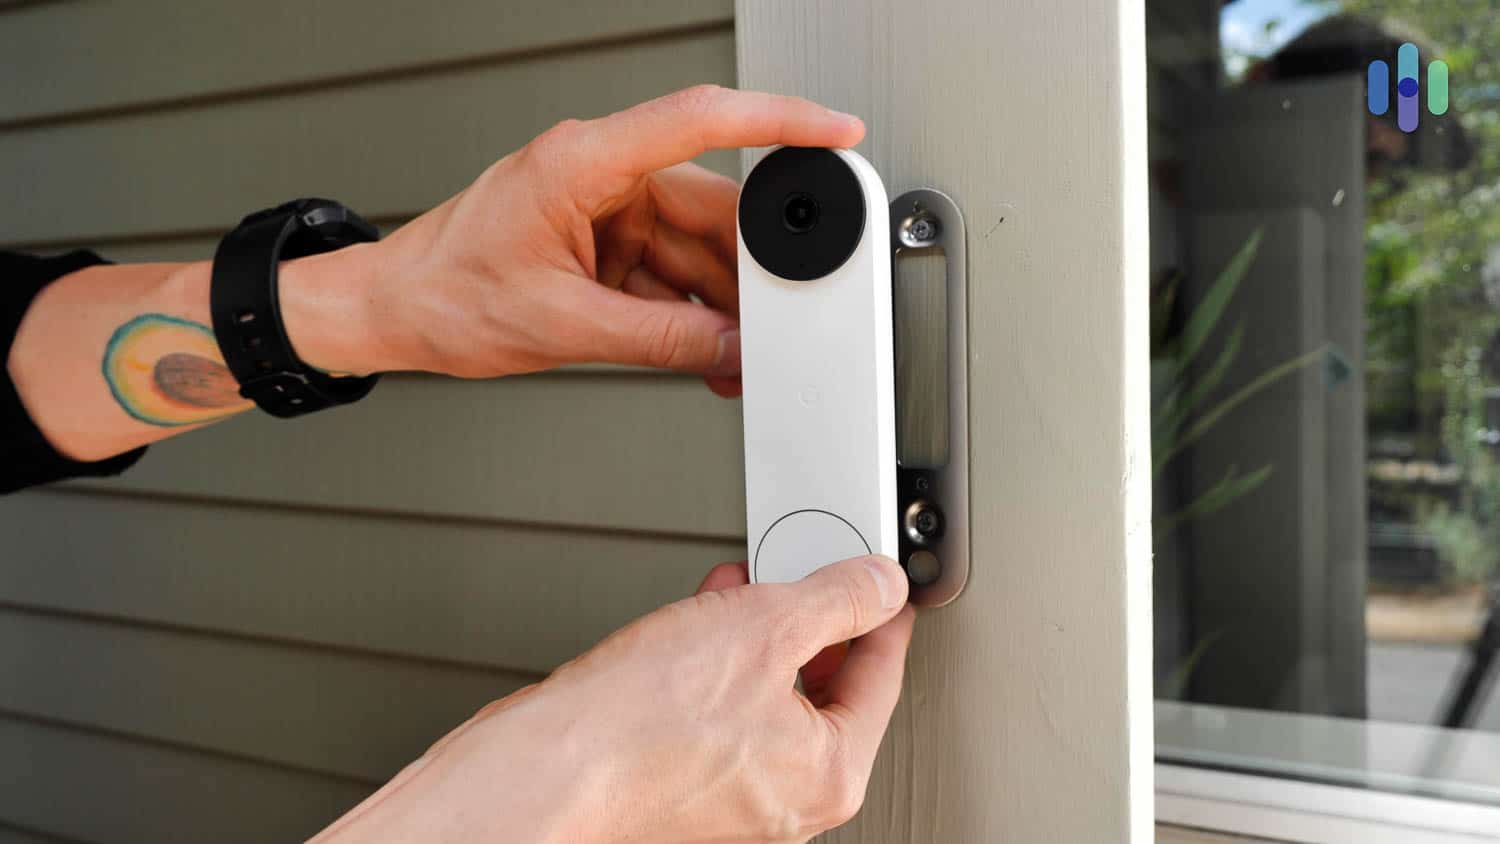 www.security.org
Step 1: Prepare the Mounting Surface
Begin by identifying the desired location for your showground Doorbell. Use a pencil to mark the positions for drilling pilot holes, ensuring they align taking into account the mounting bracket.
Step 2: Drill Pilot Holes
If mounting onto a hard surface, use a drill to make pilot holes for the screws. Be certain to use the capture drill bit size for the anchors you'll be using.
Step 3: affix the Mounting Bracket
Secure the mounting bracket in place using the provided screws or anchors. Use a level to ensure the bracket is straight and level back tightening the screws fully.
Step 4: Install the arena Doorbell
Once the mounting bracket is securely in place, it's time to install the pitch Doorbell itself. Align the device later than the bracket and slide it into point of view until it clicks into place.
Google Confirms Nest Doorbell Battery Hates The Cold – Here’s The
Door color loudcars.ro
Step 1: Prepare the Mounting Surface
Begin by identifying the desired location for your showground Doorbell. Use a pencil to mark the positions for drilling pilot holes, ensuring they align behind the mounting bracket.
Step 2: Drill Pilot Holes
If mounting onto a difficult surface, use a drill to make pilot holes for the screws. Be certain to use the invade drill bit size for the anchors you'll be using.
Step 3: affix the Mounting Bracket
Secure the mounting bracket in area using the provided screws or anchors. Use a level to ensure the bracket is straight and level back tightening the screws fully.
Step 4: Install the ground Doorbell
Once the mounting bracket is securely in place, it's era to install the pitch Doorbell itself. Align the device subsequently the bracket and slide it into point until it clicks into place.
Nest Doorbell (Battery) - Review 2021 - PCMag Australia
Door color au.pcmag.com
Step 1: Prepare the Mounting Surface
Begin by identifying the desired location for your pitch Doorbell. Use a pencil to mark the positions for drilling pilot holes, ensuring they align bearing in mind the mounting bracket.
Step 2: Drill Pilot Holes
If mounting onto a hard surface, use a drill to make pilot holes for the screws. Be distinct to use the take control of drill bit size for the anchors you'll be using.
Step 3: swell the Mounting Bracket
Secure the mounting bracket in place using the provided screws or anchors. Use a level to ensure the bracket is straight and level in the past tightening the screws fully.
Step 4: Install the arena Doorbell
Once the mounting bracket is securely in place, it's era to install the ground Doorbell itself. Align the device similar to the bracket and slide it into incline until it clicks into place.
Nest Doorbell (wired) Vs Nest Doorbell (battery): Which Should You Buy?
Door color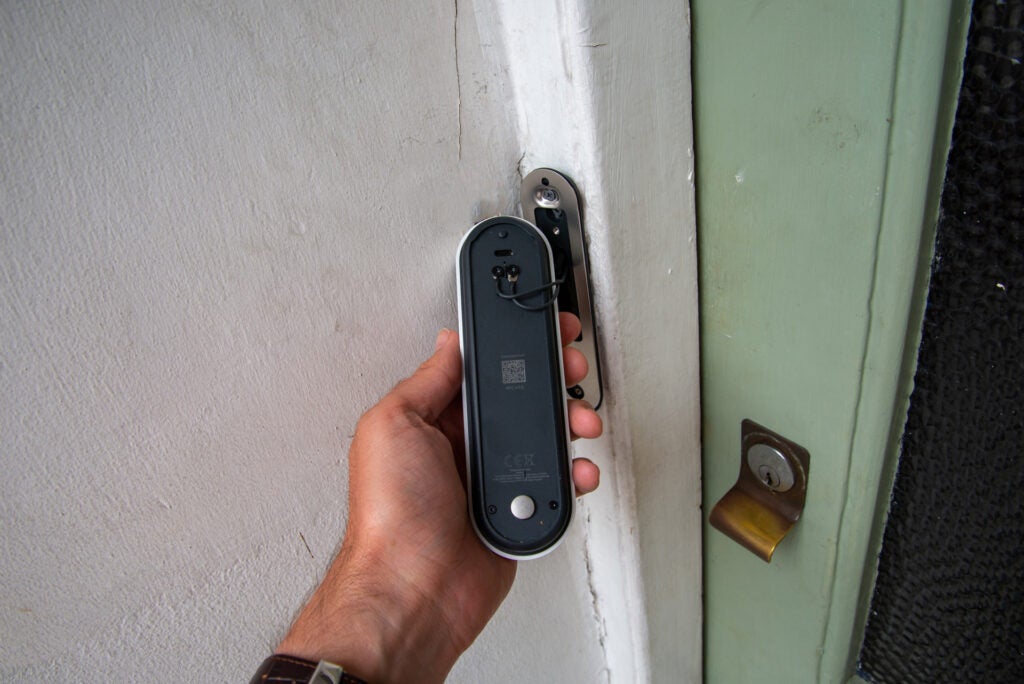 www.trustedreviews.com
Step 1: Prepare the Mounting Surface
Begin by identifying the desired location for your dome Doorbell. Use a pencil to mark the positions for drilling pilot holes, ensuring they align like the mounting bracket.
Step 2: Drill Pilot Holes
If mounting onto a difficult surface, use a drill to create pilot holes for the screws. Be definite to use the seize drill bit size for the anchors you'll be using.
Step 3: total the Mounting Bracket
Secure the mounting bracket in place using the provided screws or anchors. Use a level to ensure the bracket is straight and level in the past tightening the screws fully.
Step 4: Install the ground Doorbell
Once the mounting bracket is securely in place, it's epoch to install the arena Doorbell itself. Align the device similar to the bracket and slide it into twist until it clicks into place.
Nest Doorbell (battery) Review: More Features, Lower Quality
Door color www.trustedreviews.com
doorbell nest installed trustedreviews
Step 1: Prepare the Mounting Surface
Begin by identifying the desired location for your ring Doorbell. Use a pencil to mark the positions for drilling pilot holes, ensuring they align like the mounting bracket.
Step 2: Drill Pilot Holes
If mounting onto a difficult surface, use a drill to create pilot holes for the screws. Be definite to use the take over drill bit size for the anchors you'll be using.
Step 3: attach the Mounting Bracket
Secure the mounting bracket in area using the provided screws or anchors. Use a level to ensure the bracket is straight and level since tightening the screws fully.
Step 4: Install the auditorium Doorbell
Once the mounting bracket is securely in place, it's become old to install the ring Doorbell itself. Align the device in the same way as the bracket and slide it into slant until it clicks into place.
Google Shares Details On New Nest Cams, Battery Doorbell
Door color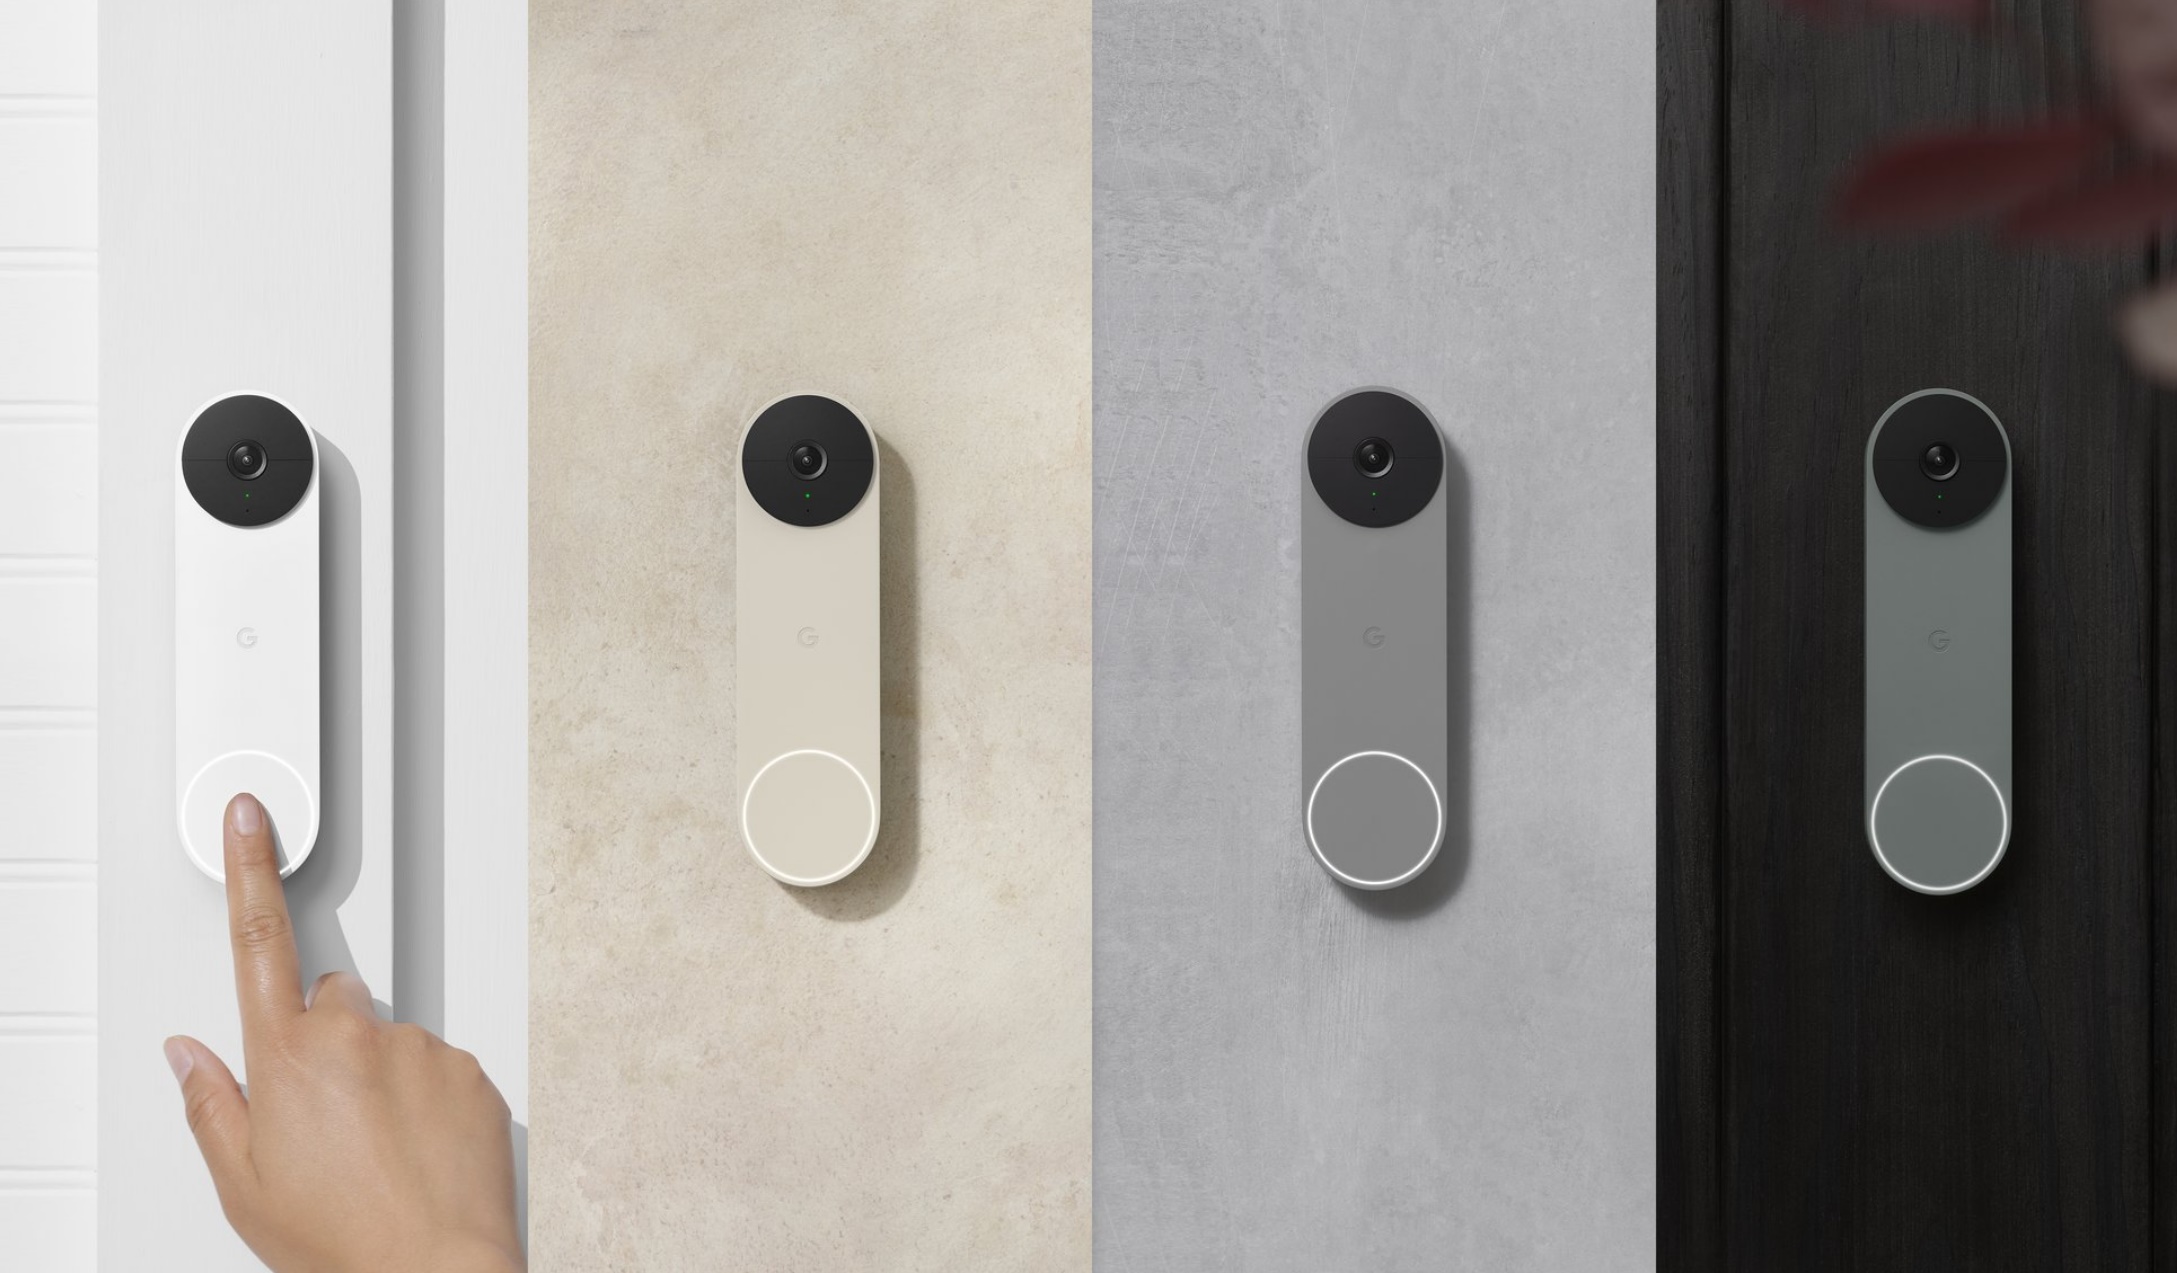 www.droid-life.com
doorbell battery cams unveils uncrate hardwarezone
Doorbell eftm putting hole. Nest doorbell (wired) vs nest doorbell (battery): which should you buy?. Google shares details on new nest cams, battery doorbell. Nest doorbell won’t charge its battery in cold weather, google confirms. Doorbell battery cams unveils uncrate hardwarezone. Nest doorbell (battery). Nest doorbell (battery) review: smart and ready to alert » eftm. Any ideas? can’t charge nest battery doorbell, mount plate won’t come. Nest video doorbell battery review for 2023. New nest cam battery: how long does it last?. Google confirms nest doorbell battery hates the cold – here’s the. Nest doorbell (battery) review: more features, lower quality. Doorbell nest installed trustedreviews