blink video doorbell battery life
If you are searching about Blink Video Doorbell - Never Buy Batteries Again ! I'll show you how you've visit to the right web. We have 10 Pics about Blink Video Doorbell - Never Buy Batteries Again ! I'll show you how like Blink Video Doorbell - Never Buy Batteries Again ! I'll show you how, How To Install Blink Doorbell - YouTube and also Blink Video Doorbell review: A budget-friendly porch watcher | TechHive. Here you go:
Step 1: Prepare the Mounting Surface
Begin by identifying the desired location for your sports ground Doorbell. Use a pencil to mark the positions for drilling pilot holes, ensuring they align bearing in mind the mounting bracket.
Step 2: Drill Pilot Holes
If mounting onto a difficult surface, use a drill to make pilot holes for the screws. Be distinct to use the capture drill bit size for the anchors you'll be using.
Step 3: swell the Mounting Bracket
Secure the mounting bracket in place using the provided screws or anchors. Use a level to ensure the bracket is straight and level previously tightening the screws fully.
Step 4: Install the sports ground Doorbell
Once the mounting bracket is securely in place, it's time to install the pitch Doorbell itself. Align the device later the bracket and slide it into viewpoint until it clicks into place.
Blink Video Doorbell - Never Buy Batteries Again ! I'll Show You How
Door color www.youtube.com
Step 1: Prepare the Mounting Surface
Begin by identifying the desired location for your showground Doorbell. Use a pencil to mark the positions for drilling pilot holes, ensuring they align in the manner of the mounting bracket.
Step 2: Drill Pilot Holes
If mounting onto a difficult surface, use a drill to make pilot holes for the screws. Be definite to use the capture drill bit size for the anchors you'll be using.
Step 3: insert the Mounting Bracket
Secure the mounting bracket in area using the provided screws or anchors. Use a level to ensure the bracket is straight and level since tightening the screws fully.
Step 4: Install the arena Doorbell
Once the mounting bracket is securely in place, it's time to install the arena Doorbell itself. Align the device bearing in mind the bracket and slide it into point of view until it clicks into place.
Blink Brings A Budget, Battery-powered Video Doorbell To Its Home
Door color newatlas.com
doorbell blink
Step 1: Prepare the Mounting Surface
Begin by identifying the desired location for your arena Doorbell. Use a pencil to mark the positions for drilling pilot holes, ensuring they align subsequently the mounting bracket.
Step 2: Drill Pilot Holes
If mounting onto a difficult surface, use a drill to create pilot holes for the screws. Be positive to use the appropriate drill bit size for the anchors you'll be using.
Step 3: intensify the Mounting Bracket
Secure the mounting bracket in place using the provided screws or anchors. Use a level to ensure the bracket is straight and level back tightening the screws fully.
Step 4: Install the showground Doorbell
Once the mounting bracket is securely in place, it's grow old to install the dome Doorbell itself. Align the device once the bracket and slide it into slope until it clicks into place.
Blink Video Doorbell Review: A Budget-friendly Porch Watcher | TechHive
Door color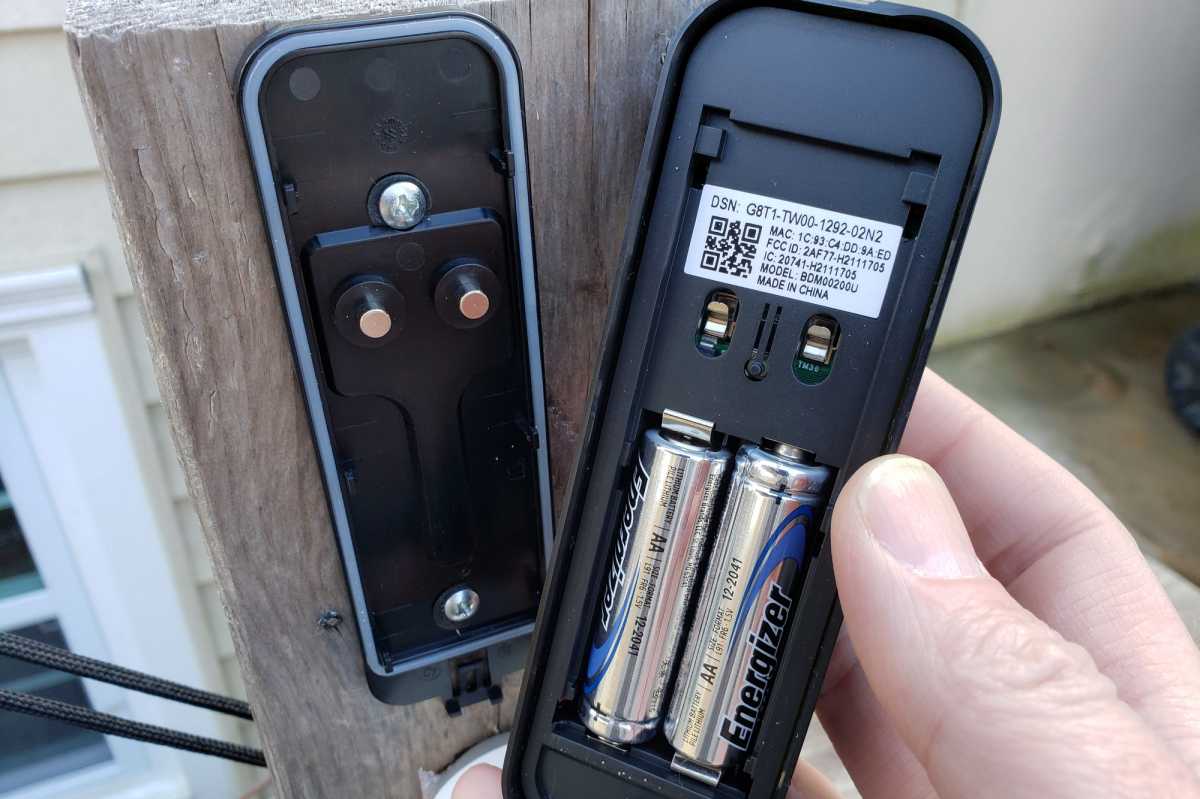 www.techhive.com
Step 1: Prepare the Mounting Surface
Begin by identifying the desired location for your arena Doorbell. Use a pencil to mark the positions for drilling pilot holes, ensuring they align in the manner of the mounting bracket.
Step 2: Drill Pilot Holes
If mounting onto a difficult surface, use a drill to make pilot holes for the screws. Be clear to use the commandeer drill bit size for the anchors you'll be using.
Step 3: count up the Mounting Bracket
Secure the mounting bracket in area using the provided screws or anchors. Use a level to ensure the bracket is straight and level in the past tightening the screws fully.
Step 4: Install the field Doorbell
Once the mounting bracket is securely in place, it's grow old to install the auditorium Doorbell itself. Align the device taking into account the bracket and slide it into position until it clicks into place.
Blink Video Doorbell Vs Google Nest Doorbell (Battery): Which Doorbell
Door color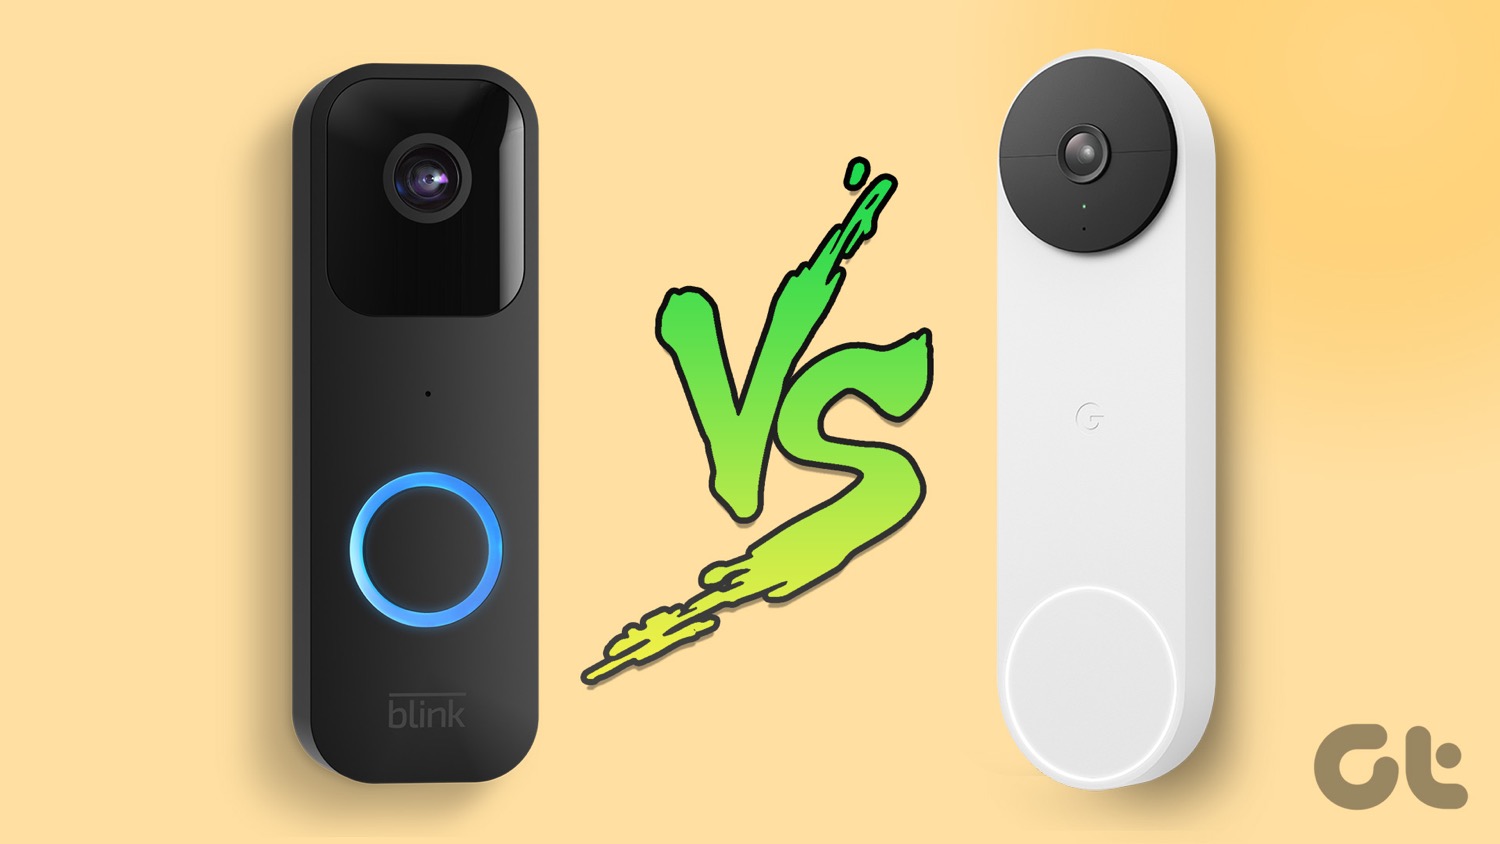 gomez.visorideags.gob.mx
Step 1: Prepare the Mounting Surface
Begin by identifying the desired location for your ground Doorbell. Use a pencil to mark the positions for drilling pilot holes, ensuring they align behind the mounting bracket.
Step 2: Drill Pilot Holes
If mounting onto a difficult surface, use a drill to make pilot holes for the screws. Be clear to use the capture drill bit size for the anchors you'll be using.
Step 3: include the Mounting Bracket
Secure the mounting bracket in place using the provided screws or anchors. Use a level to ensure the bracket is straight and level since tightening the screws fully.
Step 4: Install the showground Doorbell
Once the mounting bracket is securely in place, it's era to install the ground Doorbell itself. Align the device behind the bracket and slide it into twist until it clicks into place.
Blink Video Doorbell Review - Tech Advisor
Door color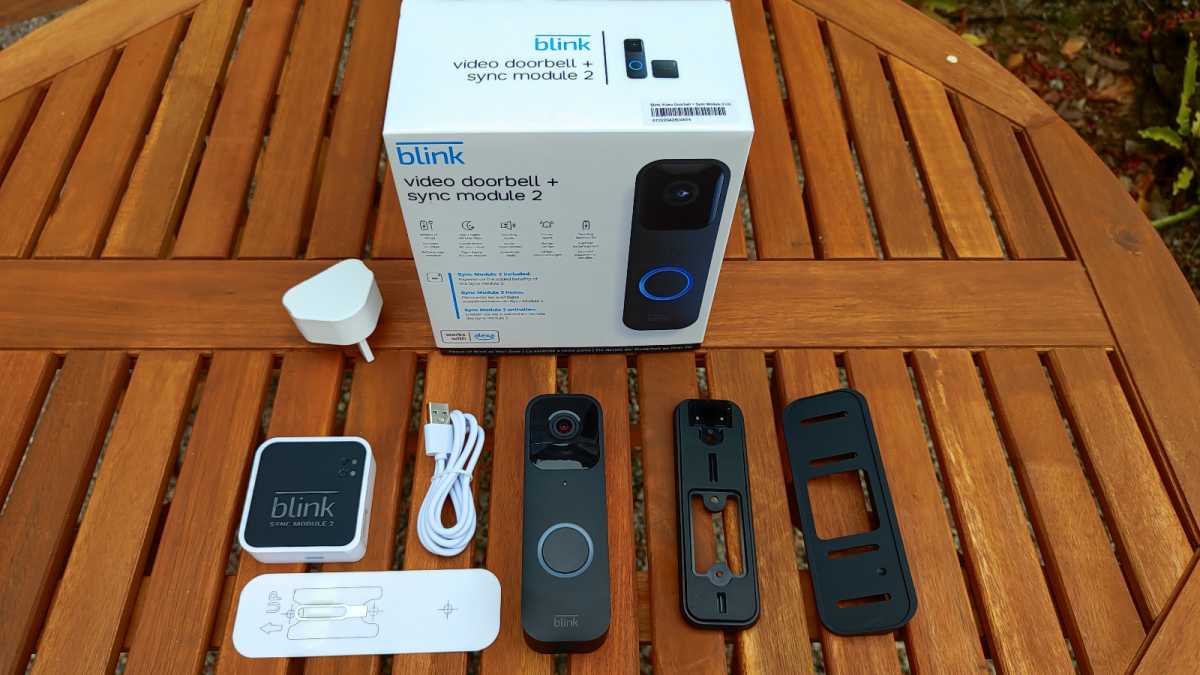 www.techadvisor.com
Step 1: Prepare the Mounting Surface
Begin by identifying the desired location for your dome Doorbell. Use a pencil to mark the positions for drilling pilot holes, ensuring they align when the mounting bracket.
Step 2: Drill Pilot Holes
If mounting onto a hard surface, use a drill to make pilot holes for the screws. Be certain to use the take possession of drill bit size for the anchors you'll be using.
Step 3: append the Mounting Bracket
Secure the mounting bracket in place using the provided screws or anchors. Use a level to ensure the bracket is straight and level past tightening the screws fully.
Step 4: Install the field Doorbell
Once the mounting bracket is securely in place, it's times to install the showground Doorbell itself. Align the device similar to the bracket and slide it into position until it clicks into place.
How To Install Blink Doorbell - YouTube
Door color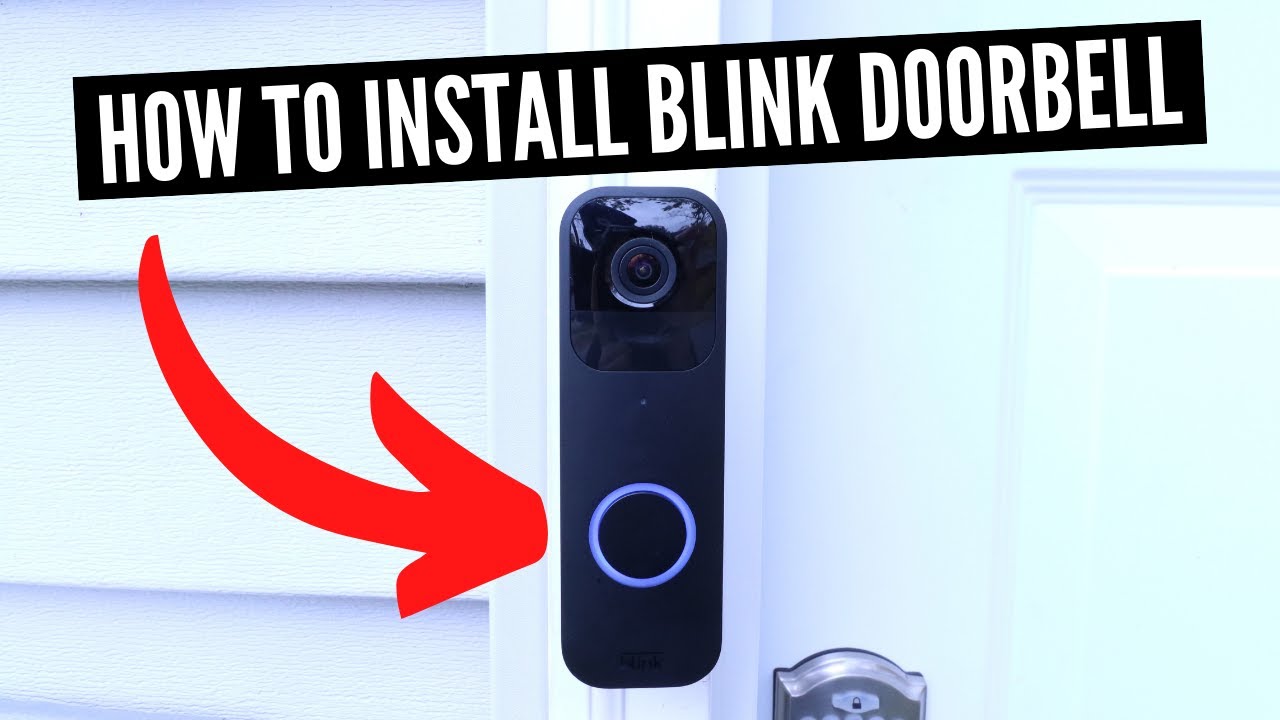 www.youtube.com
Step 1: Prepare the Mounting Surface
Begin by identifying the desired location for your dome Doorbell. Use a pencil to mark the positions for drilling pilot holes, ensuring they align next the mounting bracket.
Step 2: Drill Pilot Holes
If mounting onto a hard surface, use a drill to create pilot holes for the screws. Be definite to use the occupy drill bit size for the anchors you'll be using.
Step 3: count the Mounting Bracket
Secure the mounting bracket in area using the provided screws or anchors. Use a level to ensure the bracket is straight and level back tightening the screws fully.
Step 4: Install the arena Doorbell
Once the mounting bracket is securely in place, it's time to install the arena Doorbell itself. Align the device in the manner of the bracket and slide it into incline until it clicks into place.
Blink Video Doorbell + Sync Module 2, Two-year Battery Life, Two-way
Door color www.lowes.com
Step 1: Prepare the Mounting Surface
Begin by identifying the desired location for your ring Doorbell. Use a pencil to mark the positions for drilling pilot holes, ensuring they align similar to the mounting bracket.
Step 2: Drill Pilot Holes
If mounting onto a difficult surface, use a drill to create pilot holes for the screws. Be positive to use the seize drill bit size for the anchors you'll be using.
Step 3: improve the Mounting Bracket
Secure the mounting bracket in area using the provided screws or anchors. Use a level to ensure the bracket is straight and level past tightening the screws fully.
Step 4: Install the sports ground Doorbell
Once the mounting bracket is securely in place, it's epoch to install the field Doorbell itself. Align the device as soon as the bracket and slide it into point of view until it clicks into place.
10 Tips To Extend Your Blink Doorbell Battery Life - Greenworks Tools
Door color www.greenworksblog.com
Step 1: Prepare the Mounting Surface
Begin by identifying the desired location for your pitch Doorbell. Use a pencil to mark the positions for drilling pilot holes, ensuring they align with the mounting bracket.
Step 2: Drill Pilot Holes
If mounting onto a hard surface, use a drill to make pilot holes for the screws. Be clear to use the commandeer drill bit size for the anchors you'll be using.
Step 3: intensify the Mounting Bracket
Secure the mounting bracket in area using the provided screws or anchors. Use a level to ensure the bracket is straight and level since tightening the screws fully.
Step 4: Install the pitch Doorbell
Once the mounting bracket is securely in place, it's become old to install the arena Doorbell itself. Align the device in imitation of the bracket and slide it into slope until it clicks into place.
Blink Brings A Budget, Battery-powered Video Doorbell To Its Home
Door color newatlas.com
doorbell blink powered
Step 1: Prepare the Mounting Surface
Begin by identifying the desired location for your sports ground Doorbell. Use a pencil to mark the positions for drilling pilot holes, ensuring they align in the same way as the mounting bracket.
Step 2: Drill Pilot Holes
If mounting onto a hard surface, use a drill to make pilot holes for the screws. Be definite to use the appropriate drill bit size for the anchors you'll be using.
Step 3: intensify the Mounting Bracket
Secure the mounting bracket in place using the provided screws or anchors. Use a level to ensure the bracket is straight and level back tightening the screws fully.
Step 4: Install the showground Doorbell
Once the mounting bracket is securely in place, it's become old to install the auditorium Doorbell itself. Align the device later than the bracket and slide it into point until it clicks into place.
Blink Video Doorbell Review: A Great Budget Doorbell
Door color www.trustedreviews.com
Blink video doorbell review: a budget-friendly porch watcher. Doorbell blink powered. Blink video doorbell vs google nest doorbell (battery): which doorbell. How to install blink doorbell. Blink brings a budget, battery-powered video doorbell to its home. Blink video doorbell. Blink video doorbell review. Blink brings a budget, battery-powered video doorbell to its home. Doorbell blink. 10 tips to extend your blink doorbell battery life. Blink video doorbell review: a great budget doorbell. Blink video doorbell + sync module 2, two-year battery life, two-way